
Painting My First Utility Box in Vista
Shortly after I moved from a small desert town to Los Angeles, I started noticing all the colorful utility boxes painted around my college campus. It was fun for me to spot them while driving around the city or walking to class. I would take mental note of which ones were my favorite and why, whether it be the colors, subject, or painting style. After some time, I decided to put “paint a utility box” on my art bucket list. And just so you’re aware, this is one of those lists that I keep adding to in the back of my mind, but seldom touch. Until this year, I’d always found an excuse to stop myself from even figuring out how to paint a utility box. I convinced myself that it would be this difficult and prolonged process and that I probably wouldn’t get accepted because they wouldn’t like my art. Yeah, my brain tells me stuff like that all the time. But this year was different. I could say that again, right?
After being laid-off from my full-time job in April (and taking a week or two off to sulk and be lazy), I decided that if I’m going to pursue a career that revolves around me, my personality, and my art, I had to start by becoming my own number one fan. Instead of shying away from people’s compliments or downplaying my skills, I started “owning” my space and representing myself with confidence. It took a lot of work (and I’m still working on it) but just trying to be confident has boosted my self-esteem tremendously. So what does confidence have to do with painting a utility box?? Because I have become so much more comfortable with myself and my individuality as an artist, I’ve been able to make decisions clearly, without second-guessing myself or putting myself down. And I think the result of this newly found confidence shines in the utility box.
This is the first project I’ve ever worked on where I’ve loved creating every part of it. Usually, in the middle of a project, there’s a span of time where I just have to keep going even though the artwork doesn’t look how I think it should. Sometimes I have to keep telling myself “just keep adding more detail until it looks like something”. And if that doesn’t work, a few days away from the project usually resets my brain and allows me to continue. This one was different. I planned, prepared, and painted confidently while still being able to make decisions on the fly. And because I didn’t see much information online about “how to paint a utility box”, I’m going to take you step-by-step through the whole thing, from application to preparation to final painting. I hope you find this content useful, and I hope if you’ve been considering painting a utility box yourself, this gives you the confidence to do so. Okay, now let’s get into it. How does one paint a utility box (with confidence)??

Utility box painting by Huyen Dinh, the artist who inspired me to fill out my application.
Step 1: APPLYING
I didn’t know how easy it was to apply to paint a utility box until I read Huyen Dinh’s caption on Instagram. Turns out if you search [insert town name] + utility box, your city’s website should show up. And if your city has an active utility box program, you’ll see a clear link to the application. For reference, this is the information provided by the city of Vista, where my utility box is located. All I had to do was fill out the form and sketch up a design! Since the theme for my city’s utility box program is “Vista in Bloom”, I immediately knew I would paint something with bumblebees and daisies because… how could I go wrong with that? You know it’d be cute AF and you haven’t even seen it yet.
To complete the sketch, I downloaded the PDF application and opened the outlined box into Procreate, the app I use for Illustrating on my iPad. Using the color selector tool, I chose this muted palette of 5 colors.

I then sketched out the layout, paying attention to how the shapes interacted with the box. I wanted the whole thing to look cohesive, so I made sure to keep it asymmetrical and have elements flow from one side into the other. Once my illustration was complete, I attached both documents to an email and sent it away! I then received a confirmation email from the city letting me know that I’d be notified in a few weeks whether or not my application would be accepted.

Sure enough, I received an email a few weeks later letting me know that my application had been accepted! My next step was to fill out and return a W-2 form, so they could send me a $100 stipend for materials. Along with the $100 stipend, the city also sent me a “best practices” document for painting a utility box. Key points on this list included things such as:
Don’t’ leave your box primed and unattended for too long, so as not to encourage tagging
Latex paint is recommended for metal utility boxes
If you spill a can of paint contact us IMMEDIATELY
They were pretty serious about that last one. As part of the utility box agreement, I also had to complete the painting of the box within 60 days of receiving the stipend. So now that my application had been accepted and I’d received the money, it was time to gather the materials.
Step 2: gathering SUPPLIES
I went down to Home Depot and bought one quart of paint in Golden Aura, Secluded Woods, and Starless Night, trying to pick out colors that matched my digital design as best as I could. I also bought one gallon in Spiced Potpourri and picked up a white primer, making sure it was oil-based since that’s what was recommended by the city. In addition to the cans of paint, I also picked up some stir sticks, foam rollers, and plastic paint pan inserts. Other materials like a drop-cloth, paintbrushes, and cleaning supplies, I used what I had available at home. If you’d like to know all the materials I used for this project, there will be a downloadable supply list at the bottom of this page. All-in-all, I think I went $40 over the $100 stipend they provided, which wasn’t ideal, but I wasn’t too hard on myself. Paint isn’t cheap and I reasoned that I’d be able to use the paint I bought for different projects. In fact, I’ve already used the yellow to paint the underside of my new desk at home!


Once I had my supplies, I sat down and figured out how I would paint the utility box, logistically. After doing some research, I decided that I would first sand any rough edges, clean the utility box with mineral spirits, and then wipe it down with some paper towels. Once that was dry, I’d start painting the whole box white with primer. My next step would be to sketch out my design and go around the outlines with the main red color, filling the space in between afterward. I would then fill in the colors of other shapes and the last step would be to outline all of my shapes with the dark blue paint I’d picked up. I wanted to make sure I planned as much as possible before the painting day because I knew it was going to be a long process. I didn’t want to have to think of anything other than paint, paint, paint! Once I felt comfortable with my plan, I picked out a weekend that looked good weather-wise and waited for the day to arrive.
A few days before painting my utility box, I went into the garage to test my colors on a small canvas to make sure that the colors looked good together. I’d done my best picking out colors to match what I’d included in my digital design, but I knew that the tones varied slightly. After my small canvas was dry, I noticed that the green was darker than I’d hoped, so I added some yellow and white to lighten it up a bit. I also used an empty mason jar to mix some dark blue into the white primer to get the light grey color of the petals I wanted. I’d stopped myself from buying a quart of the light grey paint earlier since I knew I could mix some at home, and I think I matched it well! The night before, I gathered all my supplies into the garage, so that when I woke up the next morning I could pile everything into my car and go. I also made sure to charge my camera and clear out an SD card, so I could record my process.

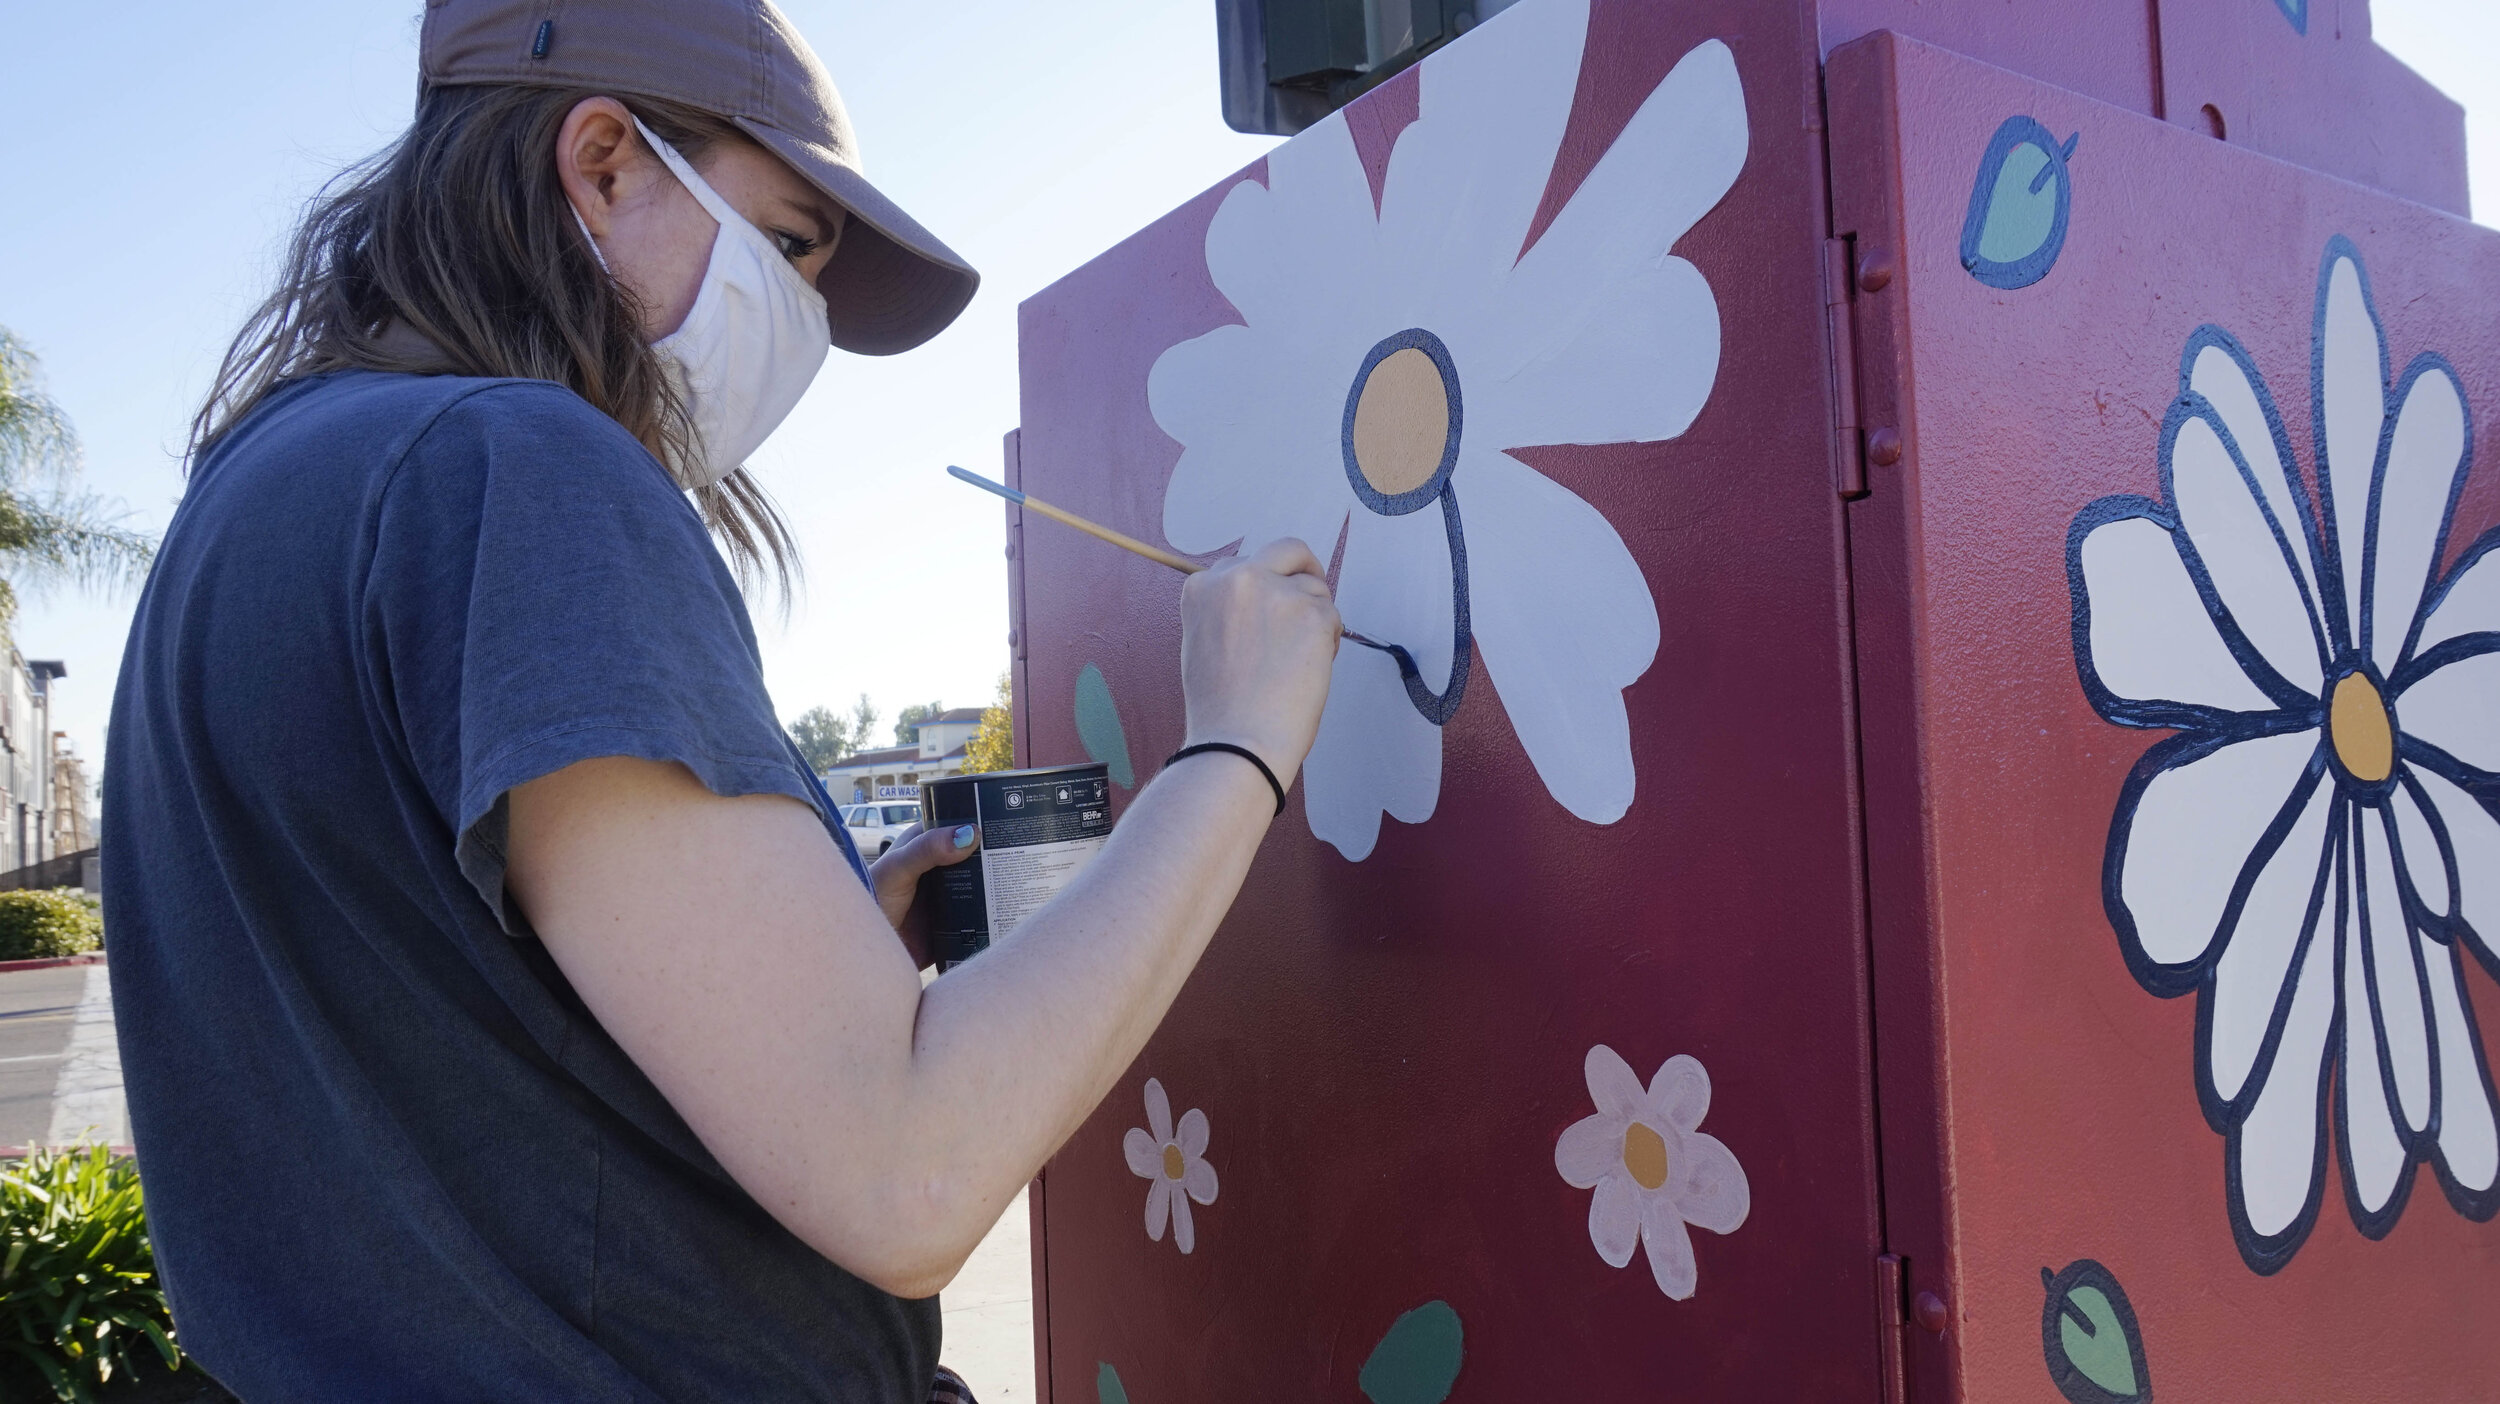
step 3: painting!
Saturday morning, I’ll admit, we slept in later than I would have liked. But after having breakfast and packing up the car, we arrived at the box around 9am. Just like I’d planned, we first sanded down any rough edges on the box and then wiped it clean with some mineral spirits and paper towels. Once the box was dry, I went in with my paint roller and covered it in white primer (except for the handles and locks).
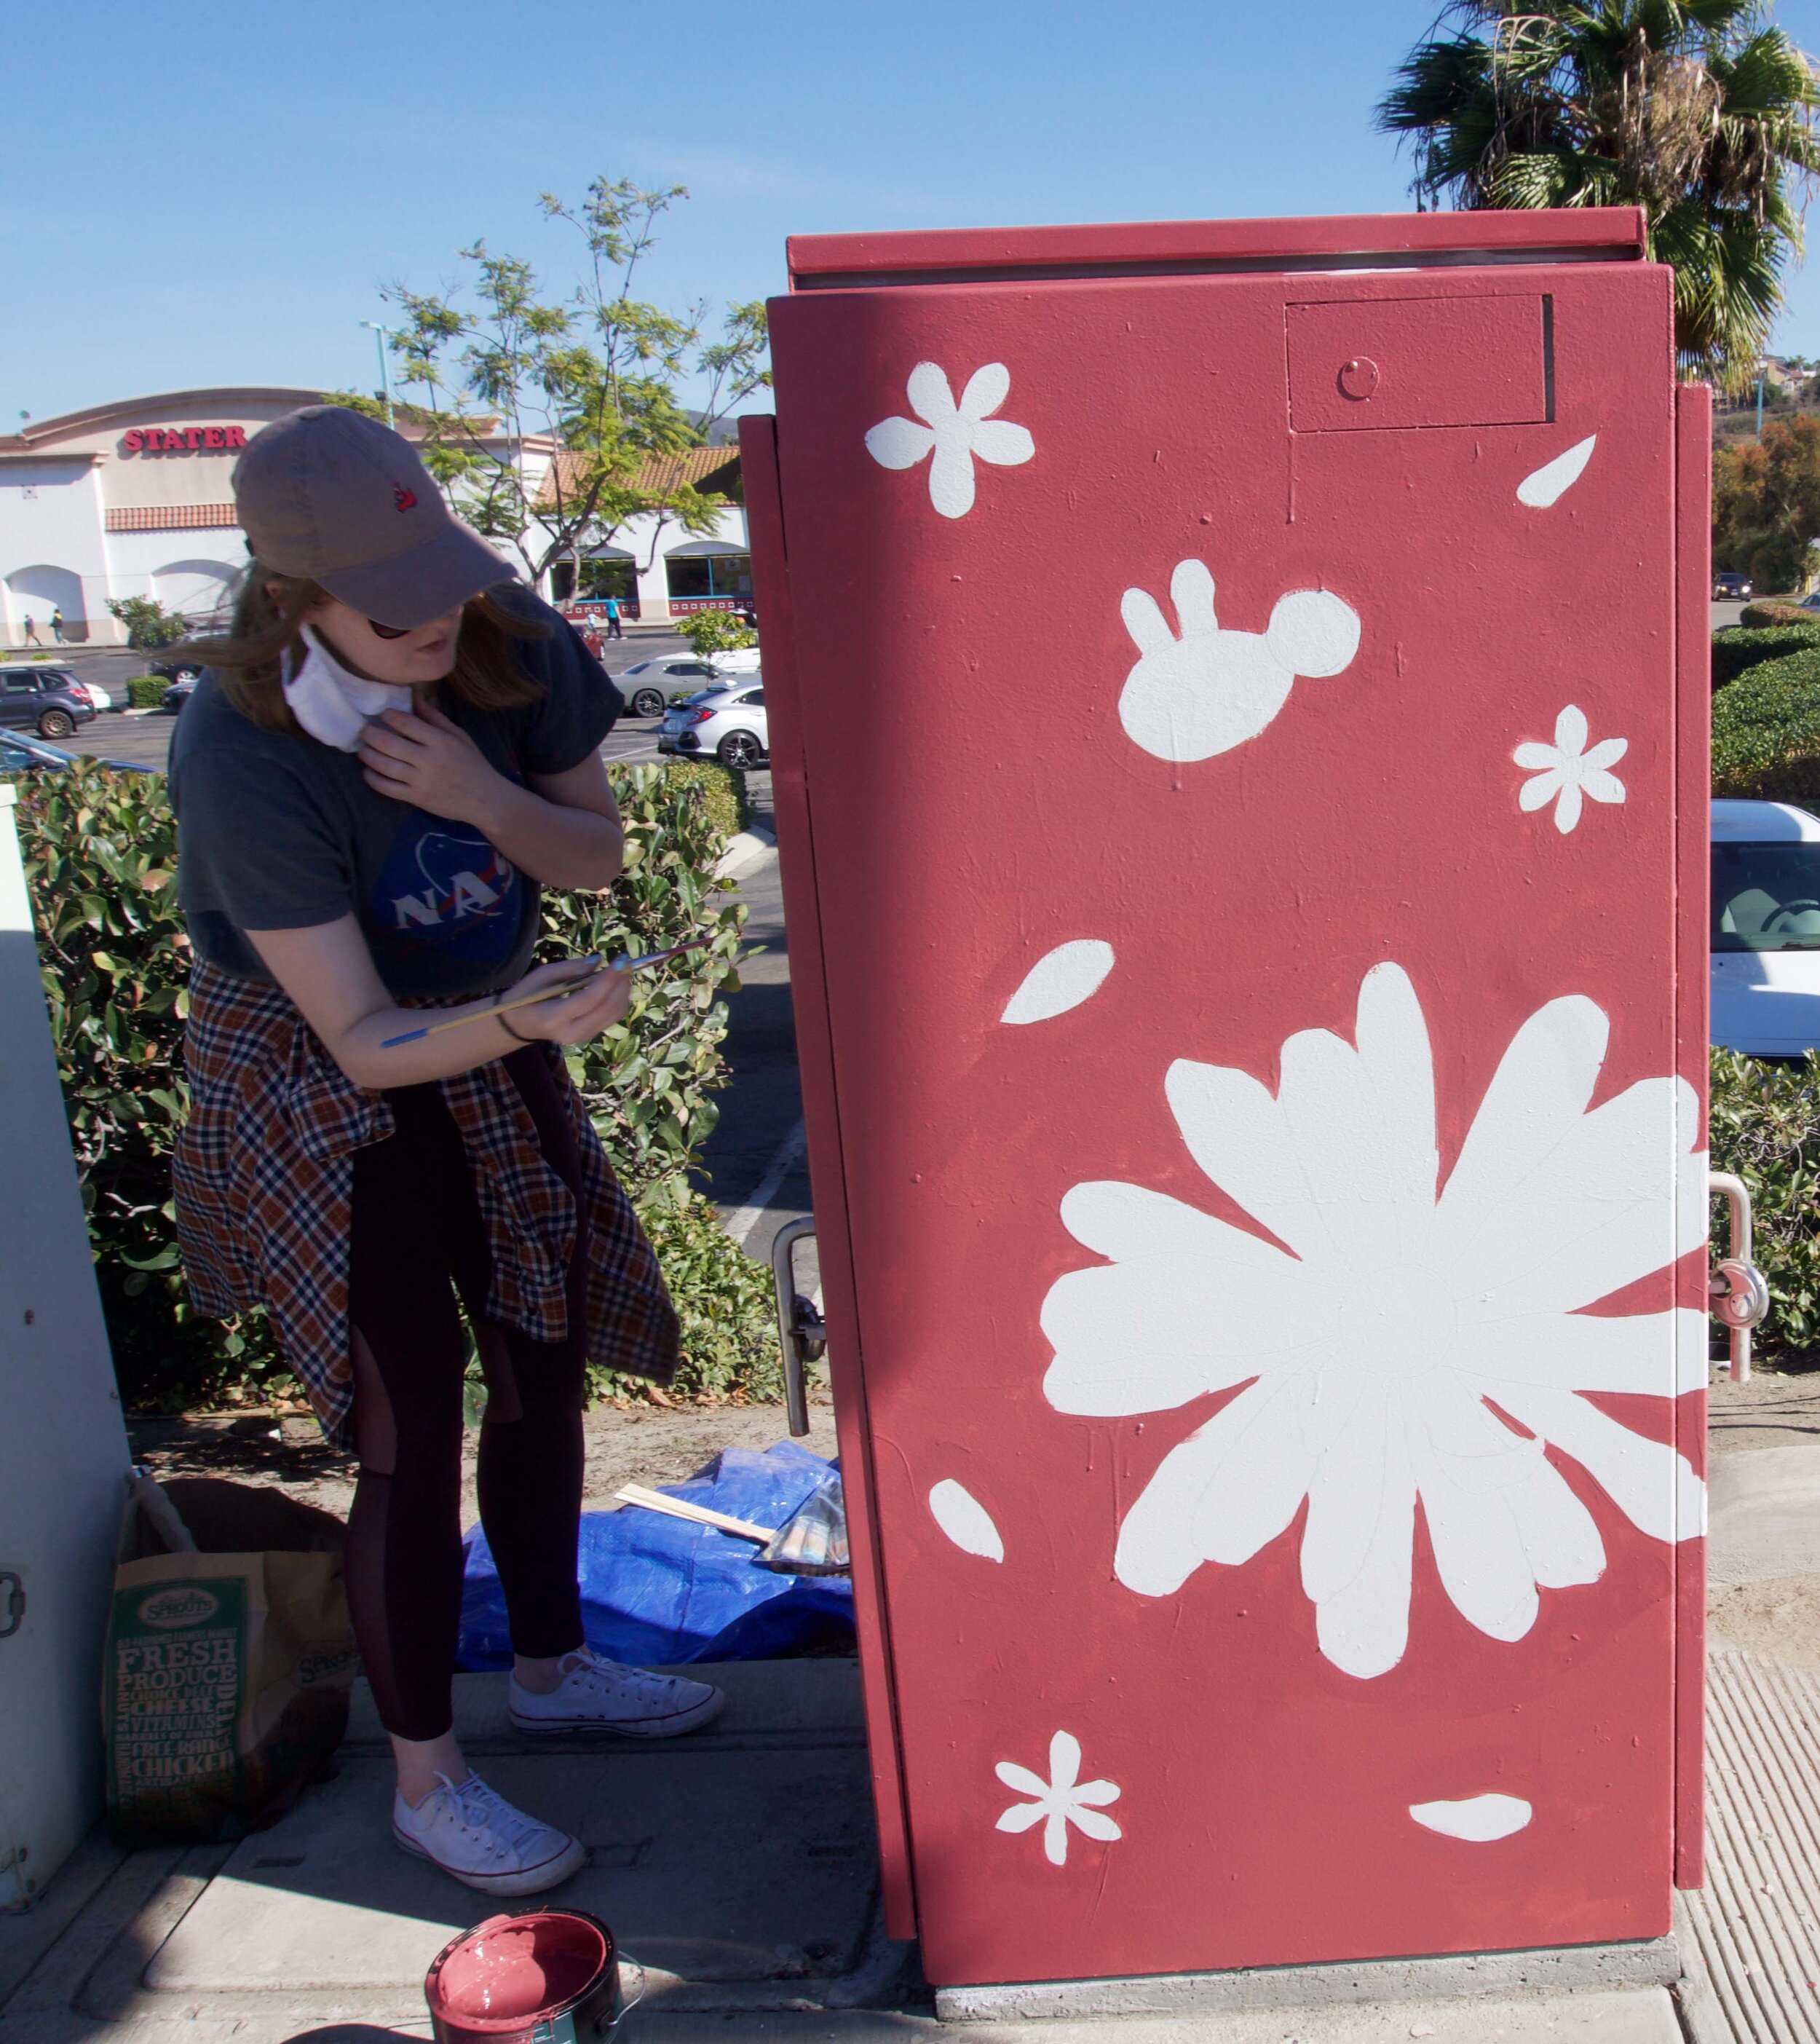
To be honest, the only reason why I would’ve liked to have arrived earlier is that primer takes a long time to dry. We spent roughly 9:30-11:30am pretty much sitting in my car, scrolling through an endless sea of Reddit, Instagram, and TikTok. Once we decided the primer was “dry enough”, I thought my next step would be to go in with a sharpie to outline my main shapes. The only problem was, since the paint was still tacky (it was dry to the touch by not dry-dry), the sharpie wouldn’t write on the box. I then went in with my pencil, but that just carved right through the layer of paint onto the box. I didn’t have much else to work with, so I stuck with the pencil and roughly sketched out my design all around the box. Typically I’d be second-guessing myself at this point, wondering if I put thing’s in the right spot and whatnot. But I actually felt confident(!!) and blocked in everything quickly.


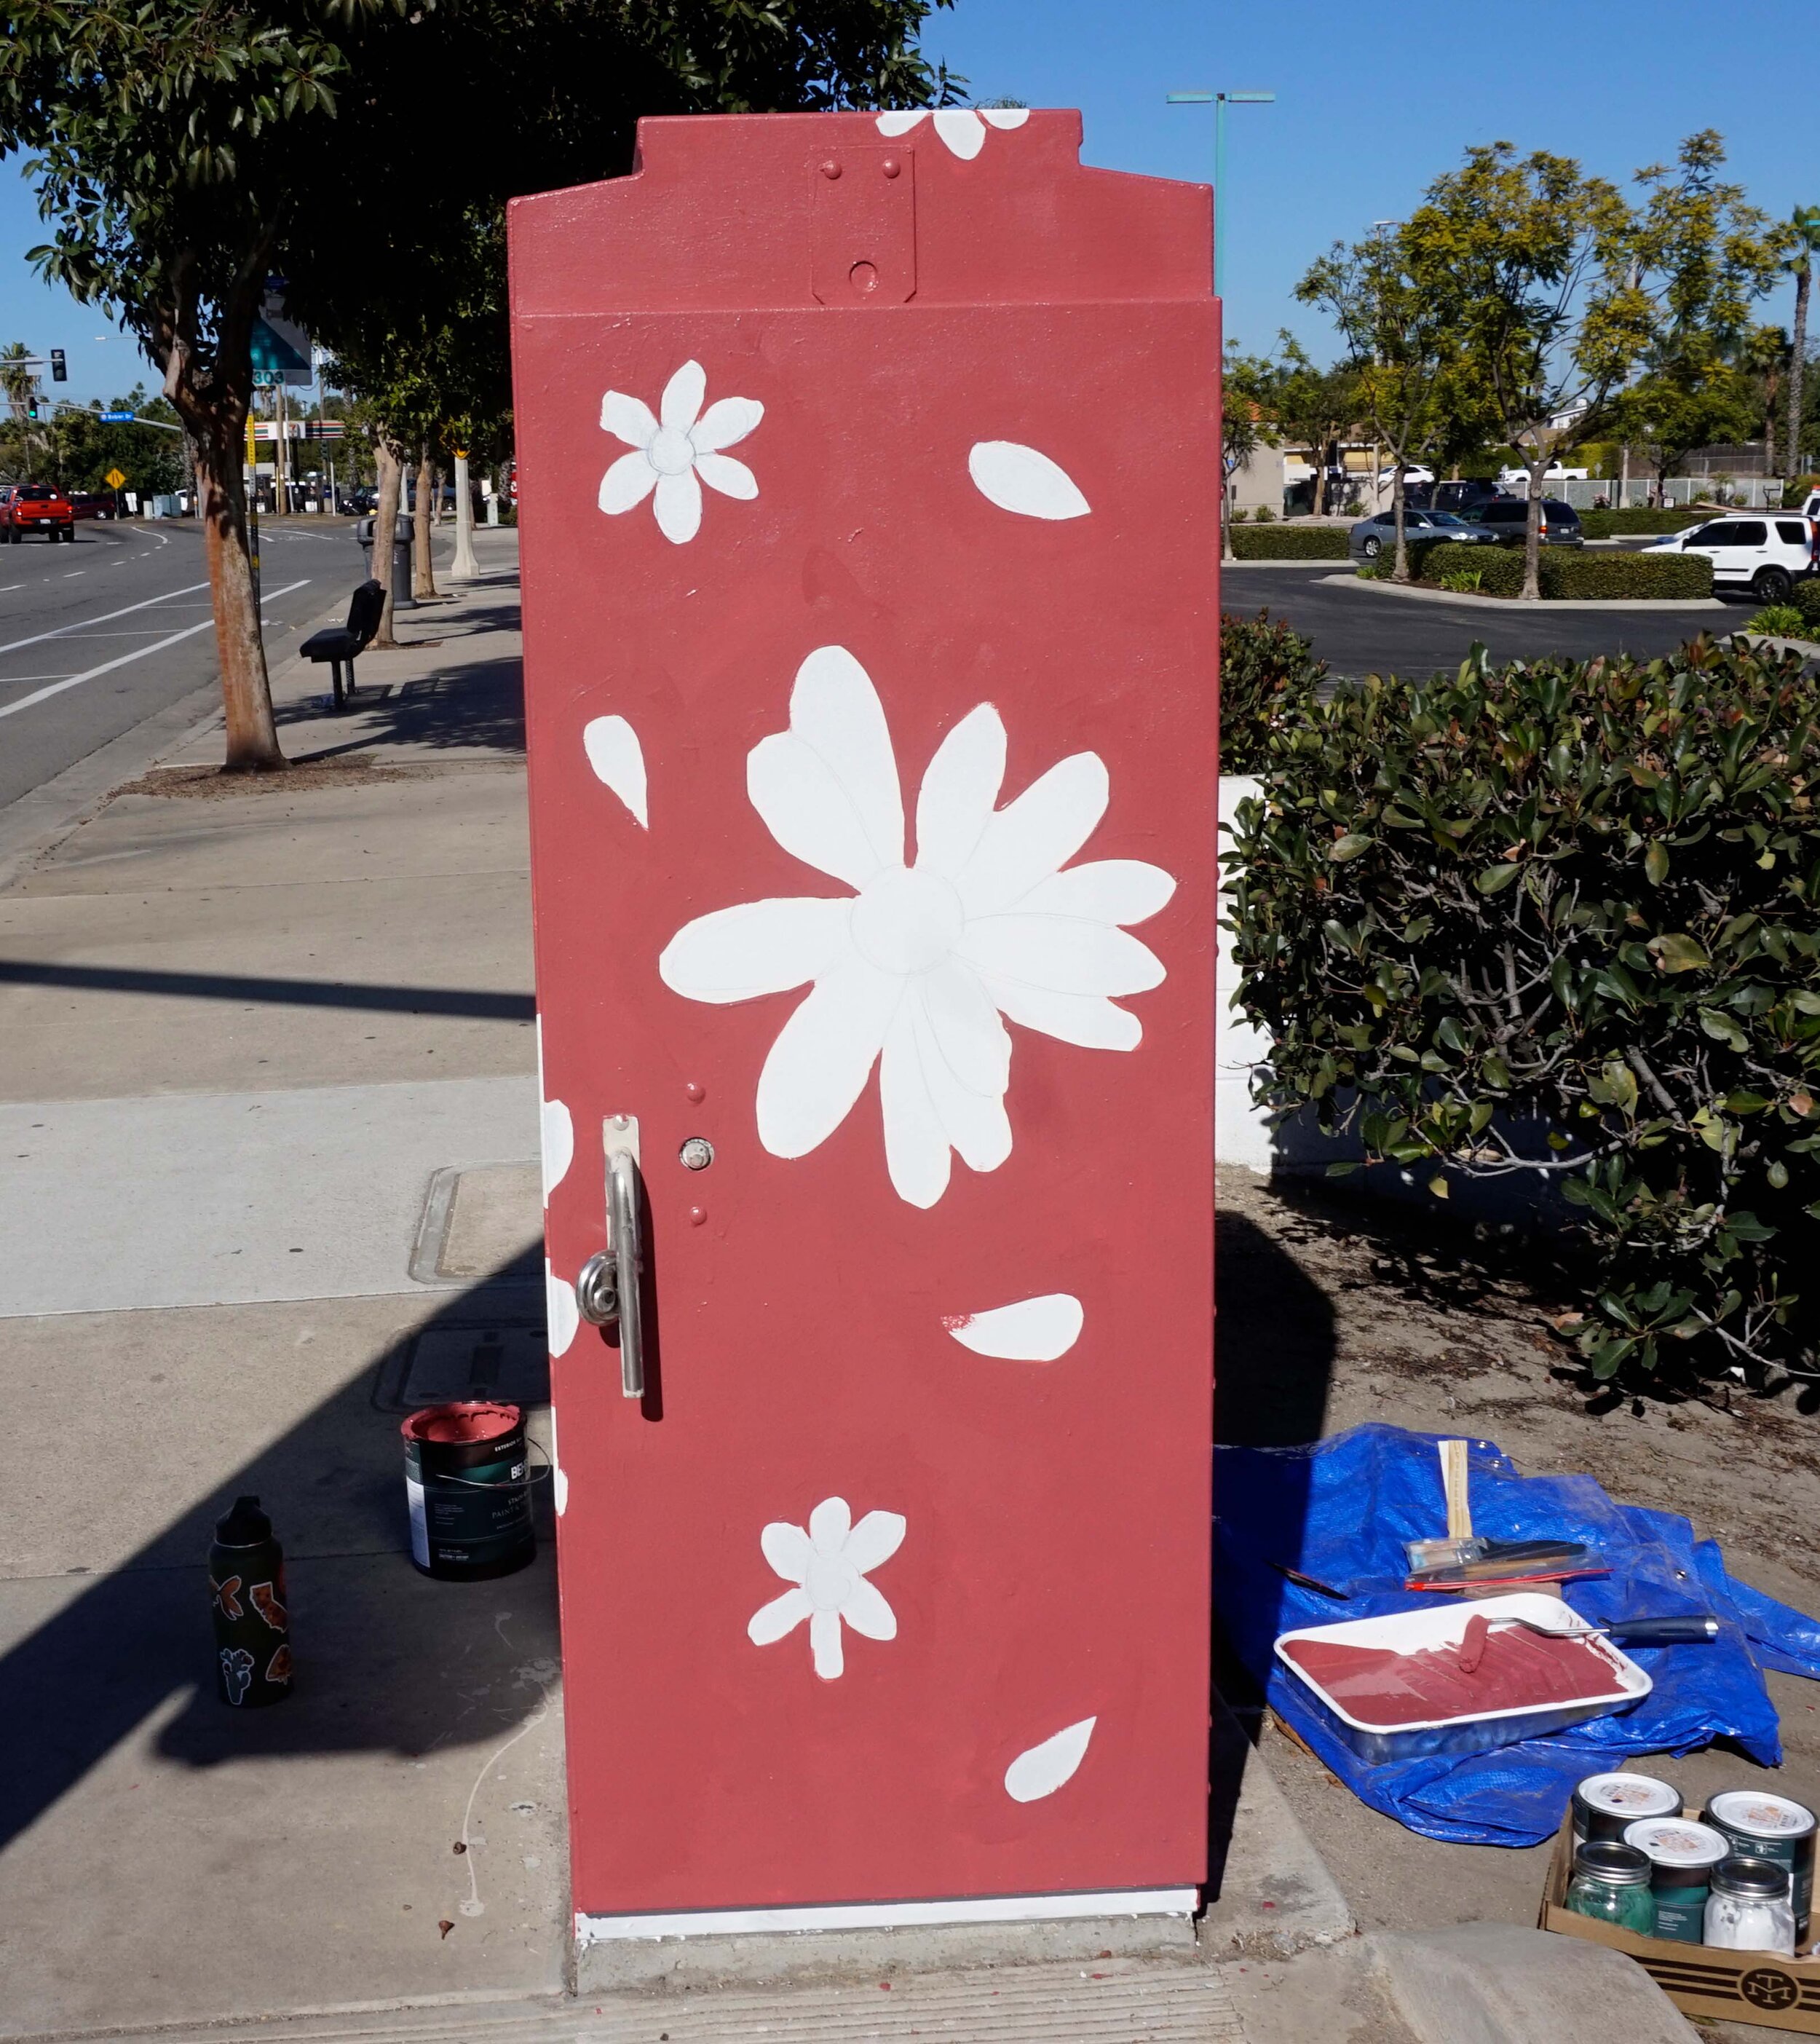
Once I had all of my shapes outlined in red paint, I required the assistance of my painting assistant to help me fill in the rest of the box with the main red color. This part of the process seriously took F-O-R-E-V-E-R. No joke, I think we spent about 2 hours making sure that the red paint was opaque and that there were no streaky patches or missed spots. At this point, full disclosure, we’d been at the utility box for about 5 hours and I was v hungry, but I wanted to push through and get the main color down so it could dry while we had lunch. My parents brought us sandwiches so we could refuel, and I went right back to painting after scarfing down half of a veggie sub.
Even though the red paint wasn’t totally dry by the time we were done eating, we could still go in and start painting the other colors of the box. My assistant was a huge help at this stage as well, painting the green leaves as I moved around him to paint the yellow of the bumblebees and light grey of the flower petals. I took some time to show him an example of how I would paint a leaf and then sent him off to paint the rest. We each wore a wireless earbud and listened to music together as we painted around the box. We worked in tandem like this for quite some time and honestly, it was nice to see the final product come to life after hours of dealing with only two colors. During this whole process, after we were done using a brush, we would place it in a gallon-sized plastic bag and seal it up. I didn’t have anywhere to rinse out my brushes on-site, and I wanted to make sure they didn’t dry up before I was able to take them home and wash the paint out of them.

Showing him how I would paint the leaves.

Looking over everything before going in with the blue outline.
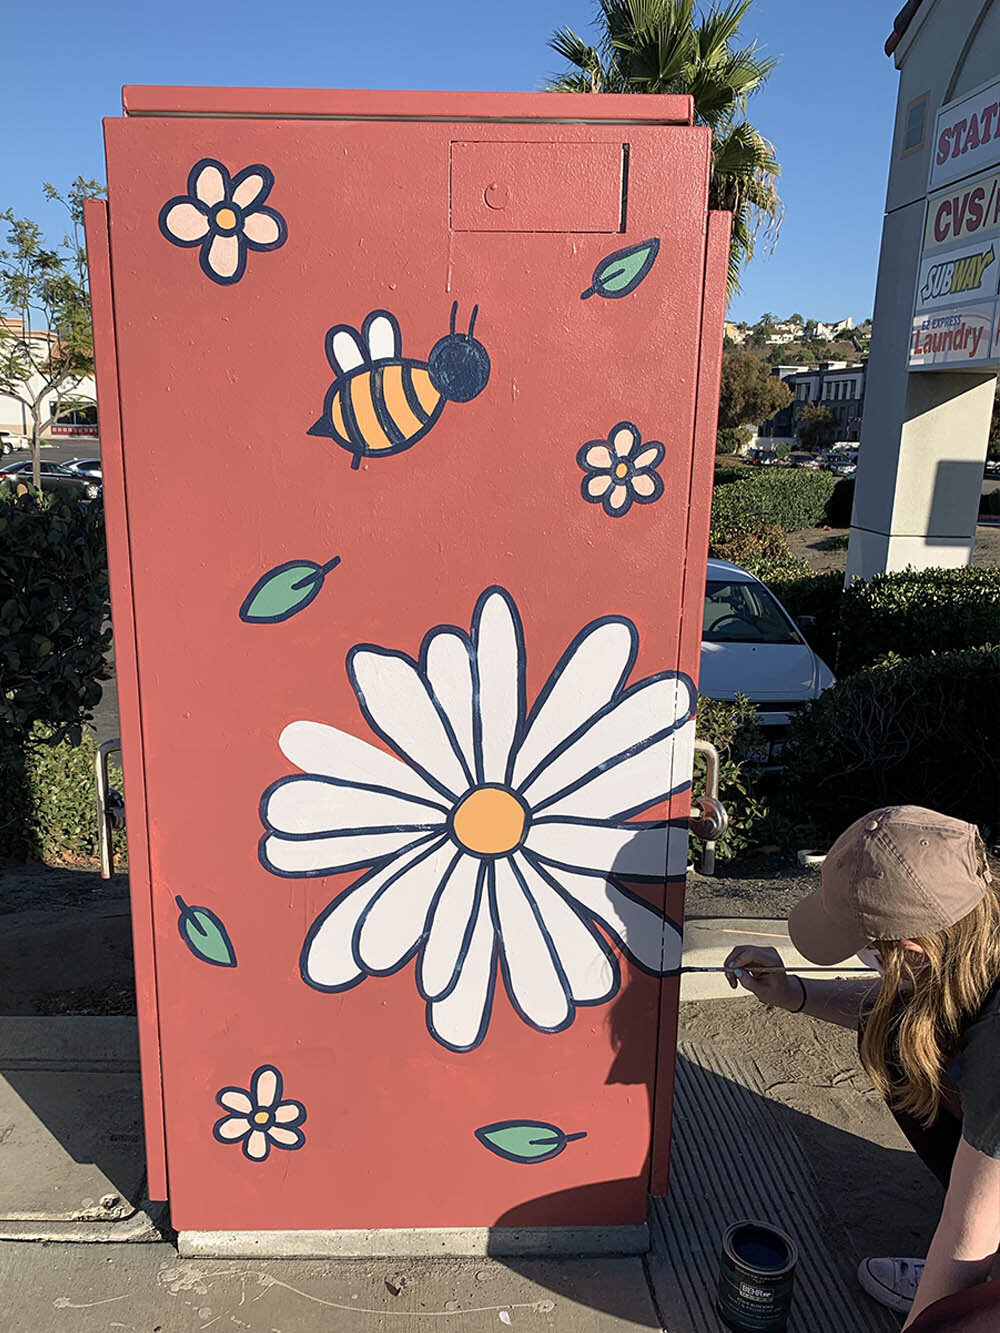
Once the shapes of color were all painted onto the box, it was time for me to outline. At this point, my assistant left the painting to me and transitioned to my cameraman. Along with this blog post, we also filmed the whole day. You can watch a quick 60-second video of me painting the utility box on Instagram, link below. Then, using a small, straight-edged brush, I slowly began to outline everything.
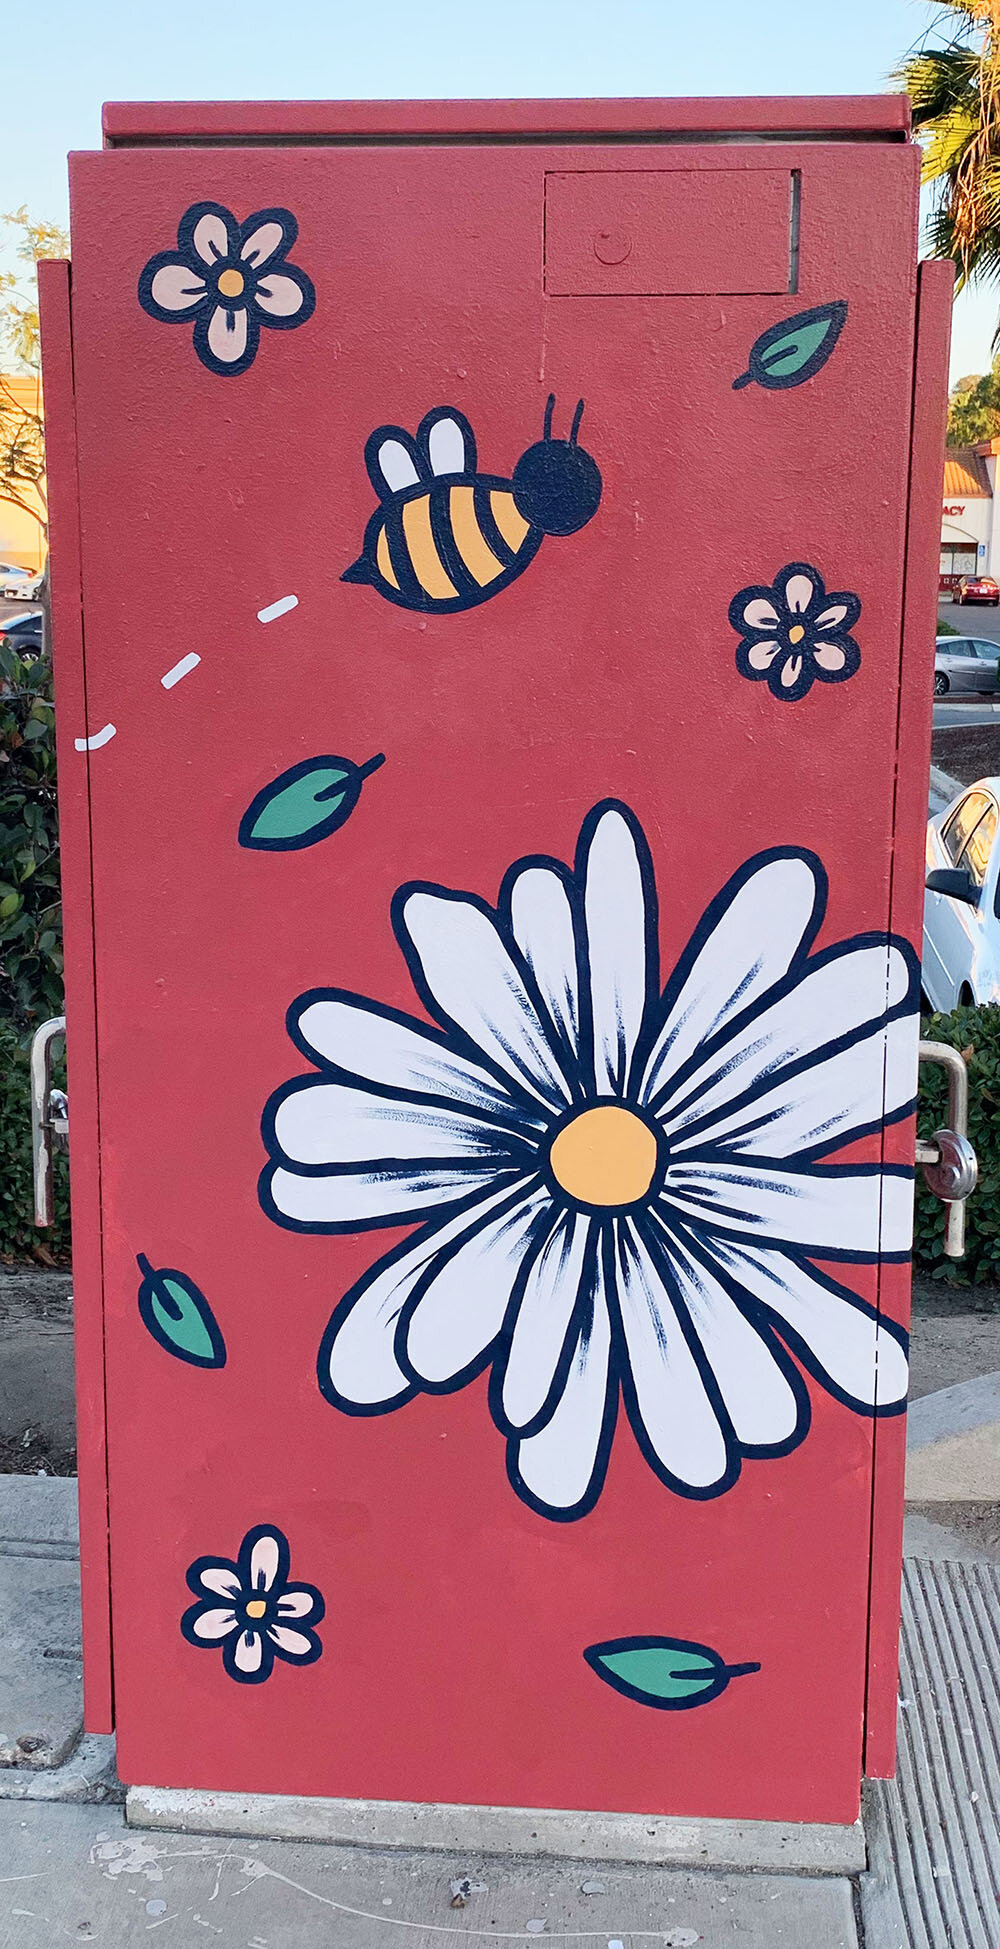
And just so you know, I made two mistakes while painting my utility box. The first was, I wanted the small daisies to be a light peach color, as you see below. I hadn’t pre-mixed this color and whipped something up quickly by mixing some variation of the yellow, grey, and red colors. Unfortunately, the first combo I mixed up was too dark. I thought it could work, so I started to paint a few daisies, but quickly realized that it blended too much into the red color when it dried. I had to start over and mix a lighter color, which I liked much better. Also, as you can see, I’d started to add a leg to my bumblebee. That was my second mistake of the day. We have it on camera, but literally, after I put down the first leg I turned and asked “How many legs does a bee have”? I knew the answer was six, but for some reason, I didn’t think that would look right. We looked up what a cartoon bee looks like, and some of those only had four legs. After staring at both real and fake bees for several seconds, I decided to just paint over the one stroke I’d made and make my bee’s legless. I was starting to mentally fade at this point and I didn’t think a bee leg was worth my mental energy.

It took me some time to get used to the technique of painting the outline, which turned out to be globbing a bunch of paint onto the brush and putting it on the box before it dripped onto the floor. Honestly, that’s the only way I know how to describe it. Once I got to the linework stage, my mind fully went into production mode. My body and brain were both tired, and I knew I didn’t have much sunlight left to work with. In addition to that, I also knew that I didn’t want to come back the next day to finish any details, so my only option was to power through. I focussed on each shape, one after the other until finally everything was outlined. I had to go back over a few spots where the paint appeared streaky or needed a thicker stroke. After outlining all of my shapes, I went back to the daisies and added details to the inner part of the petals.


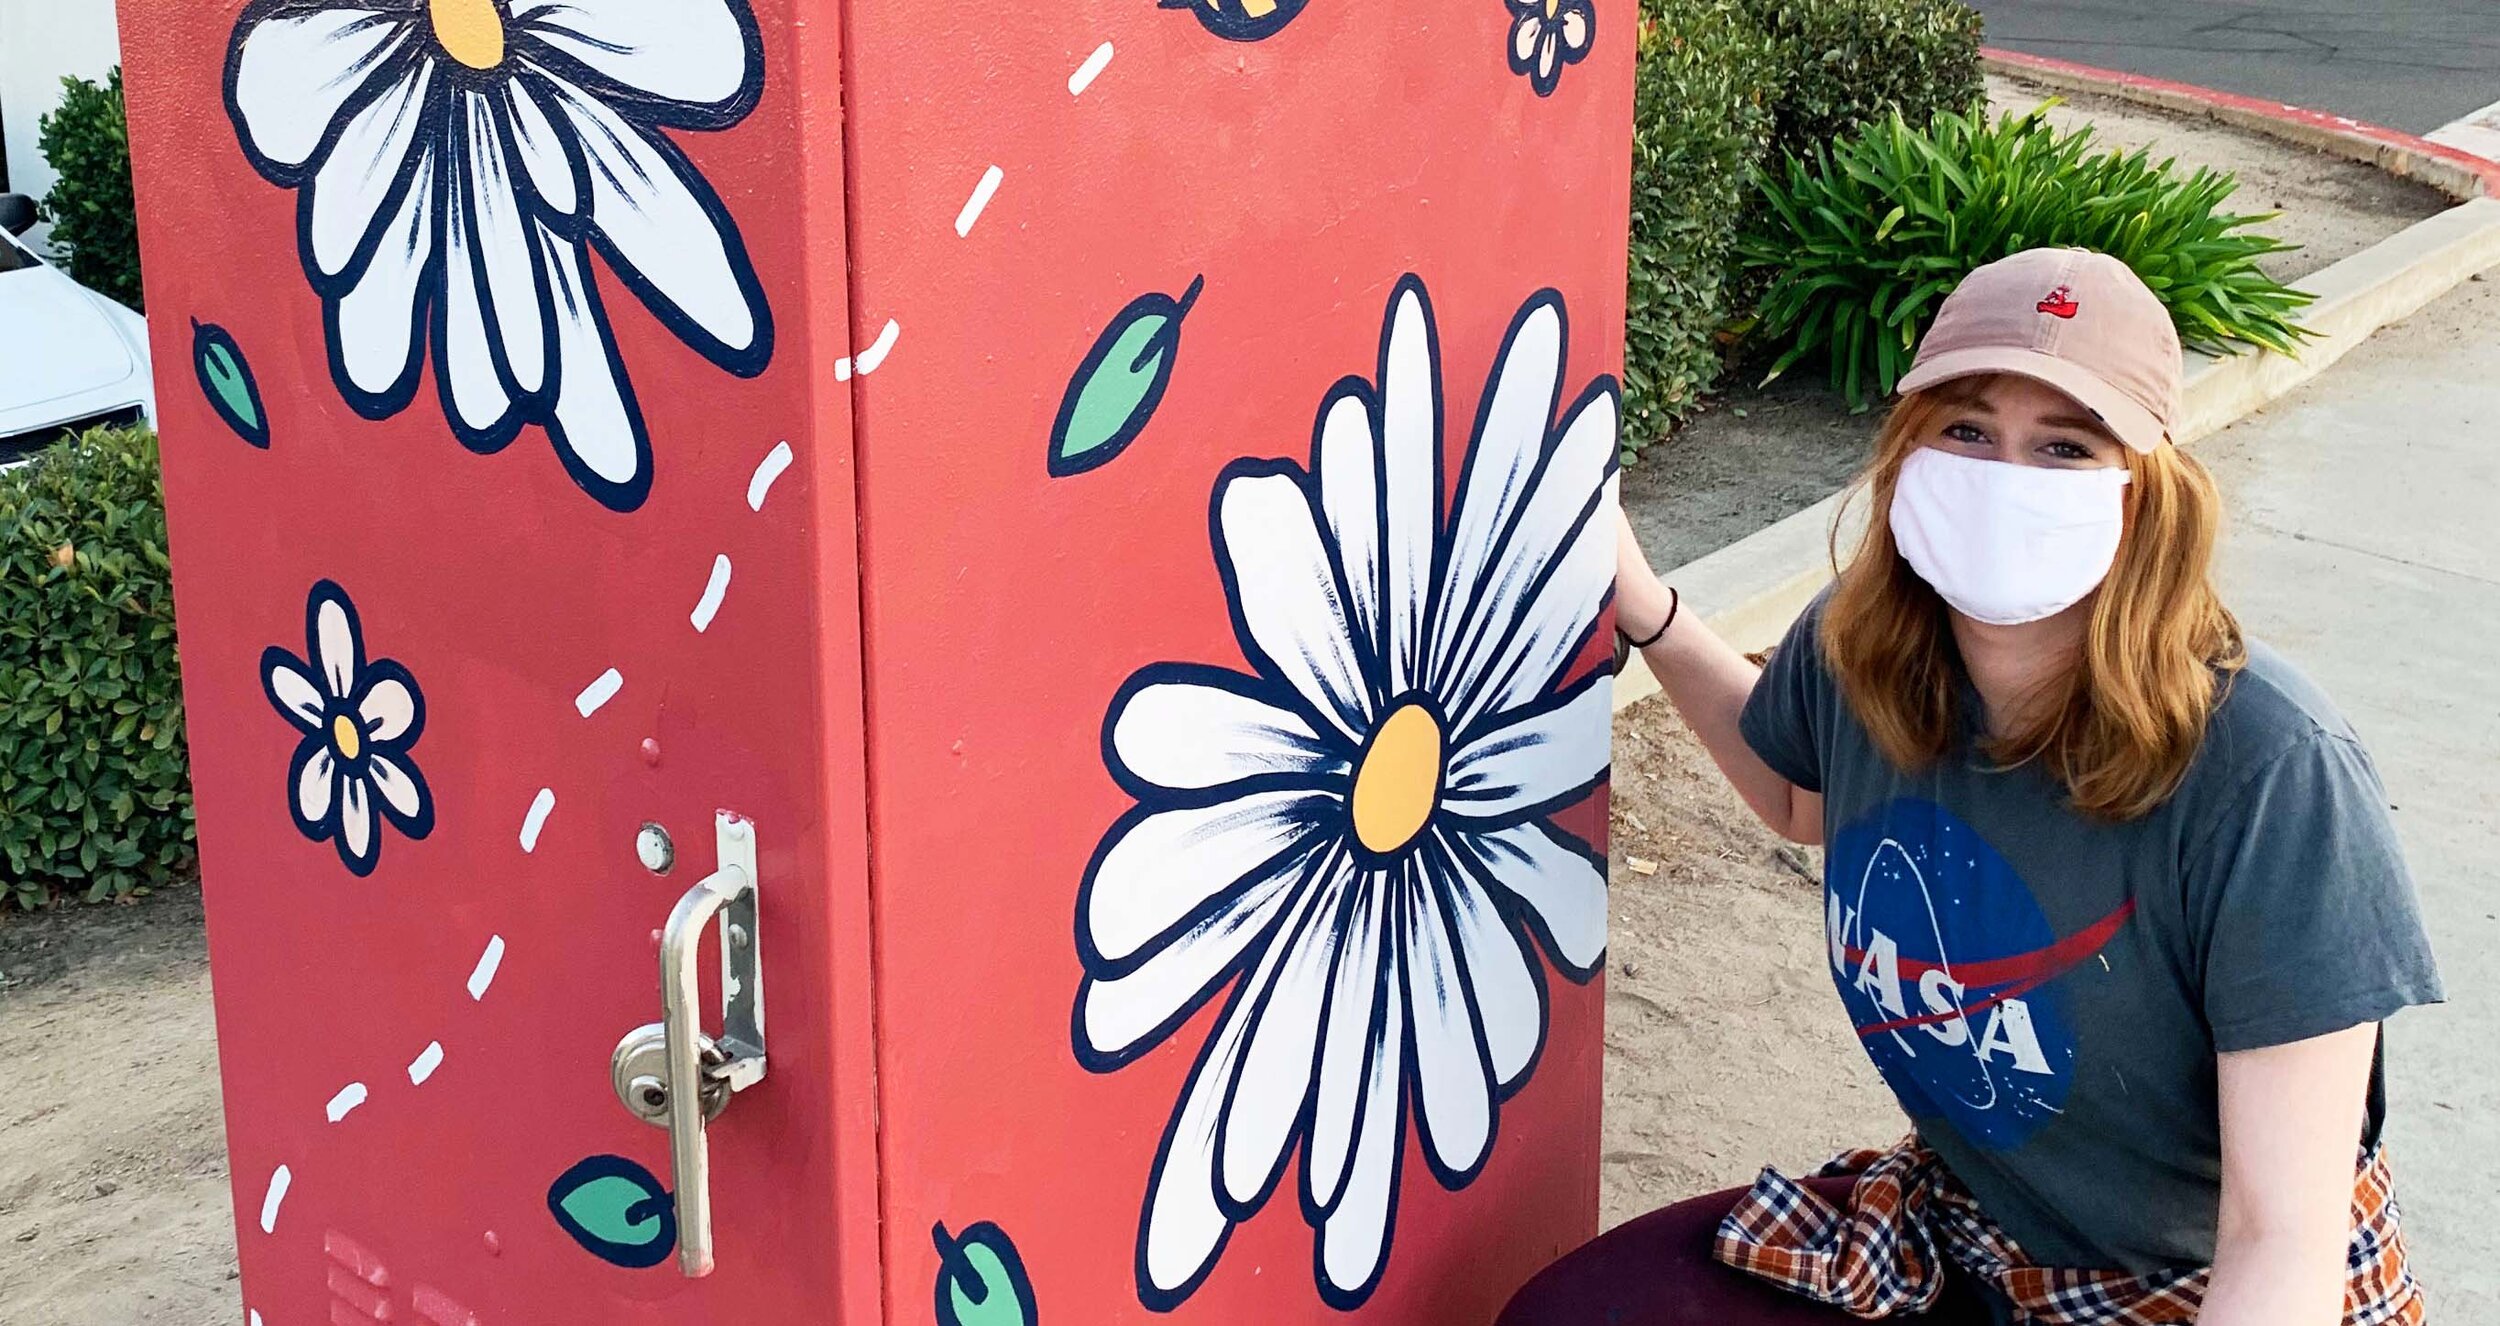
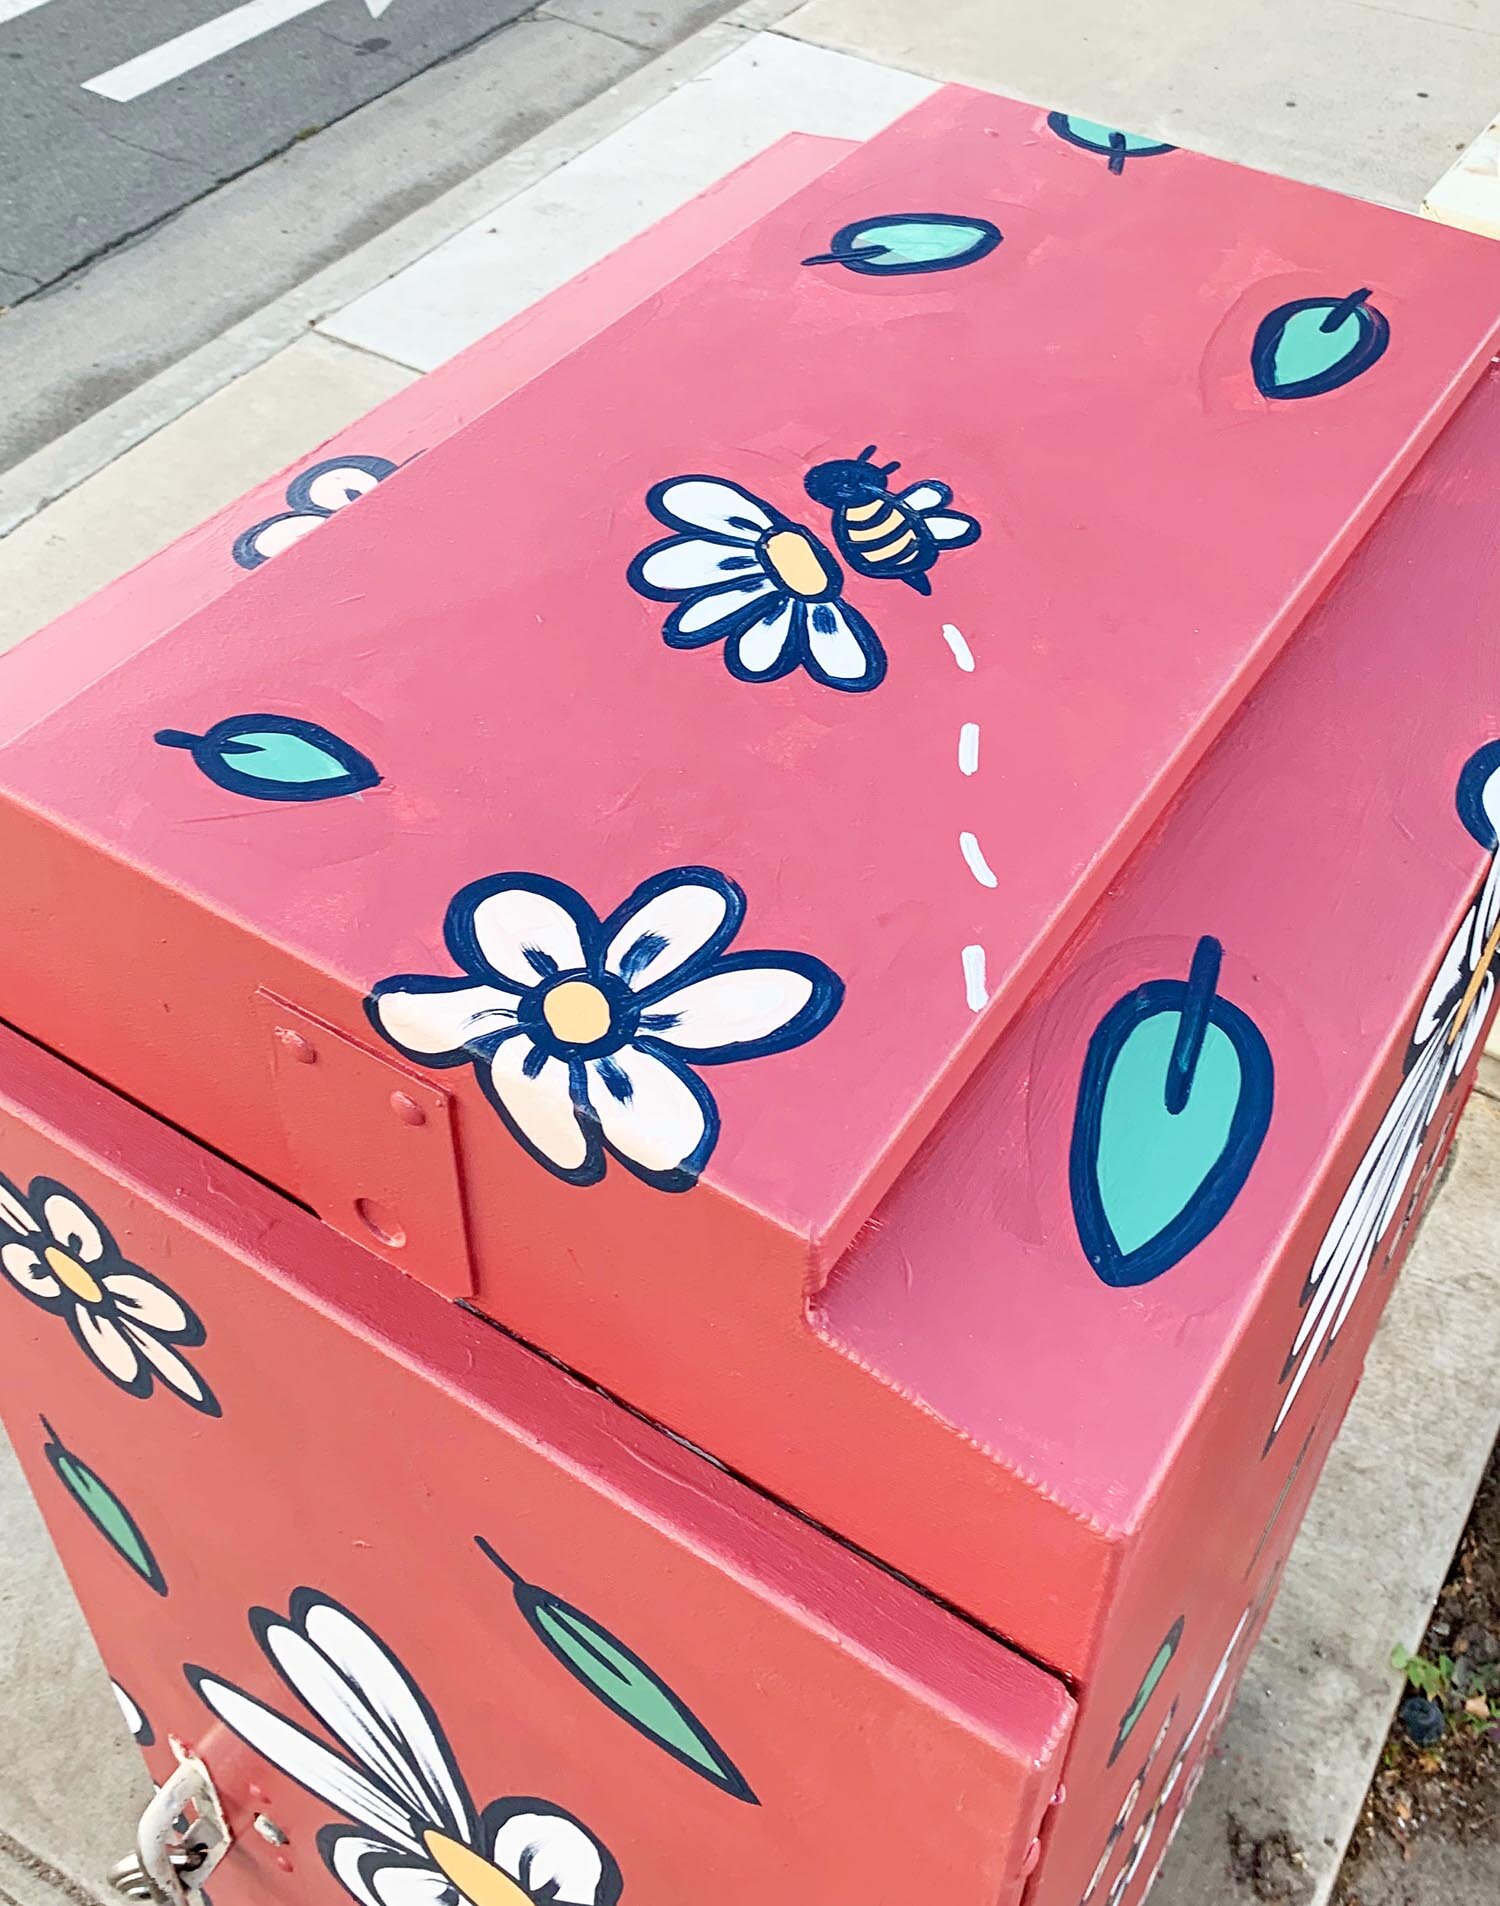
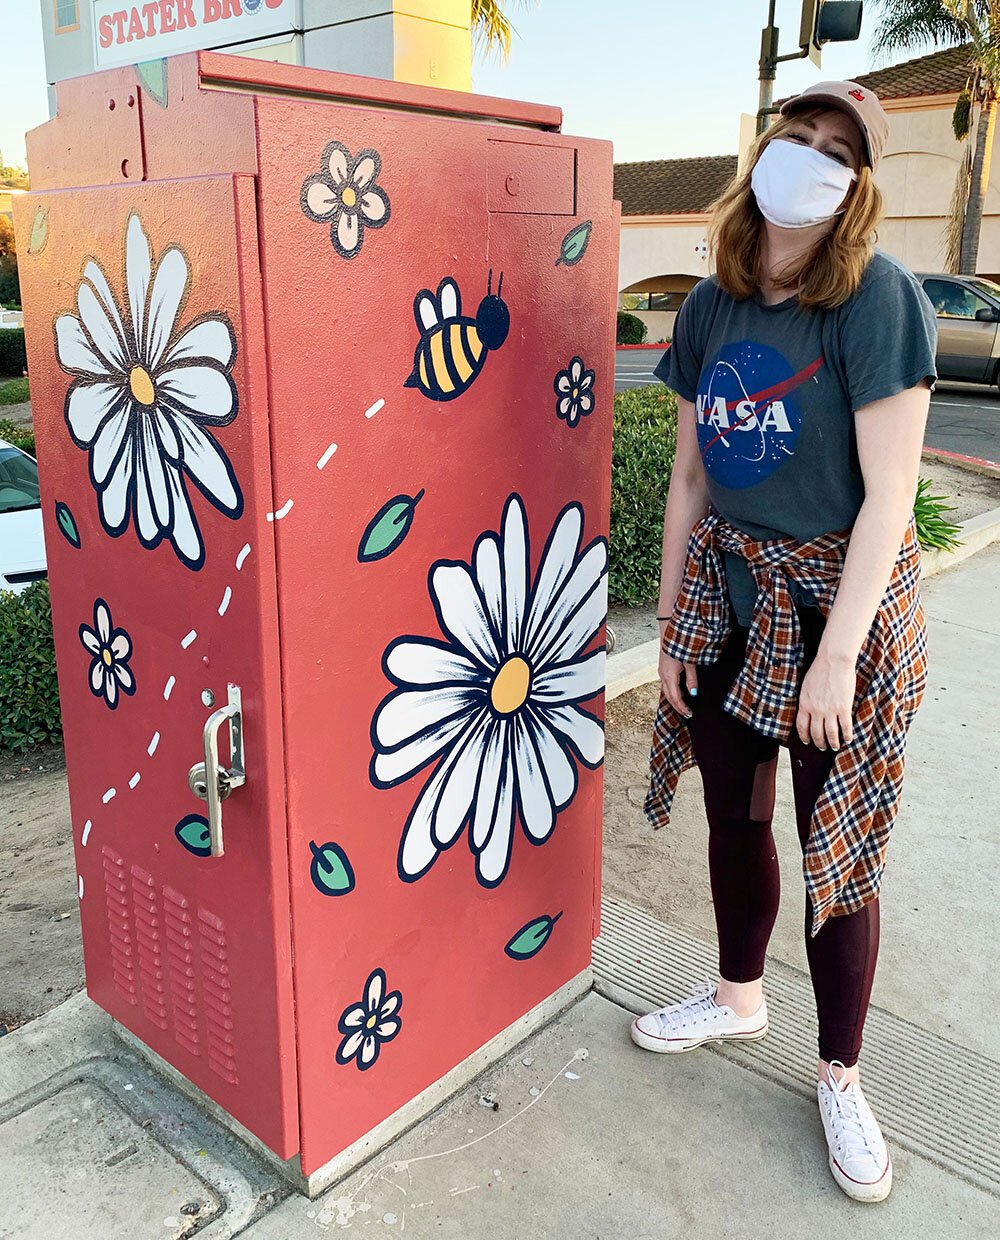
The two final elements I added to my utility box was the white dashed lines of the bee’s flight path and my business name. After those finishing touches, we cleaned up, packed up, and took photos of the finished piece!
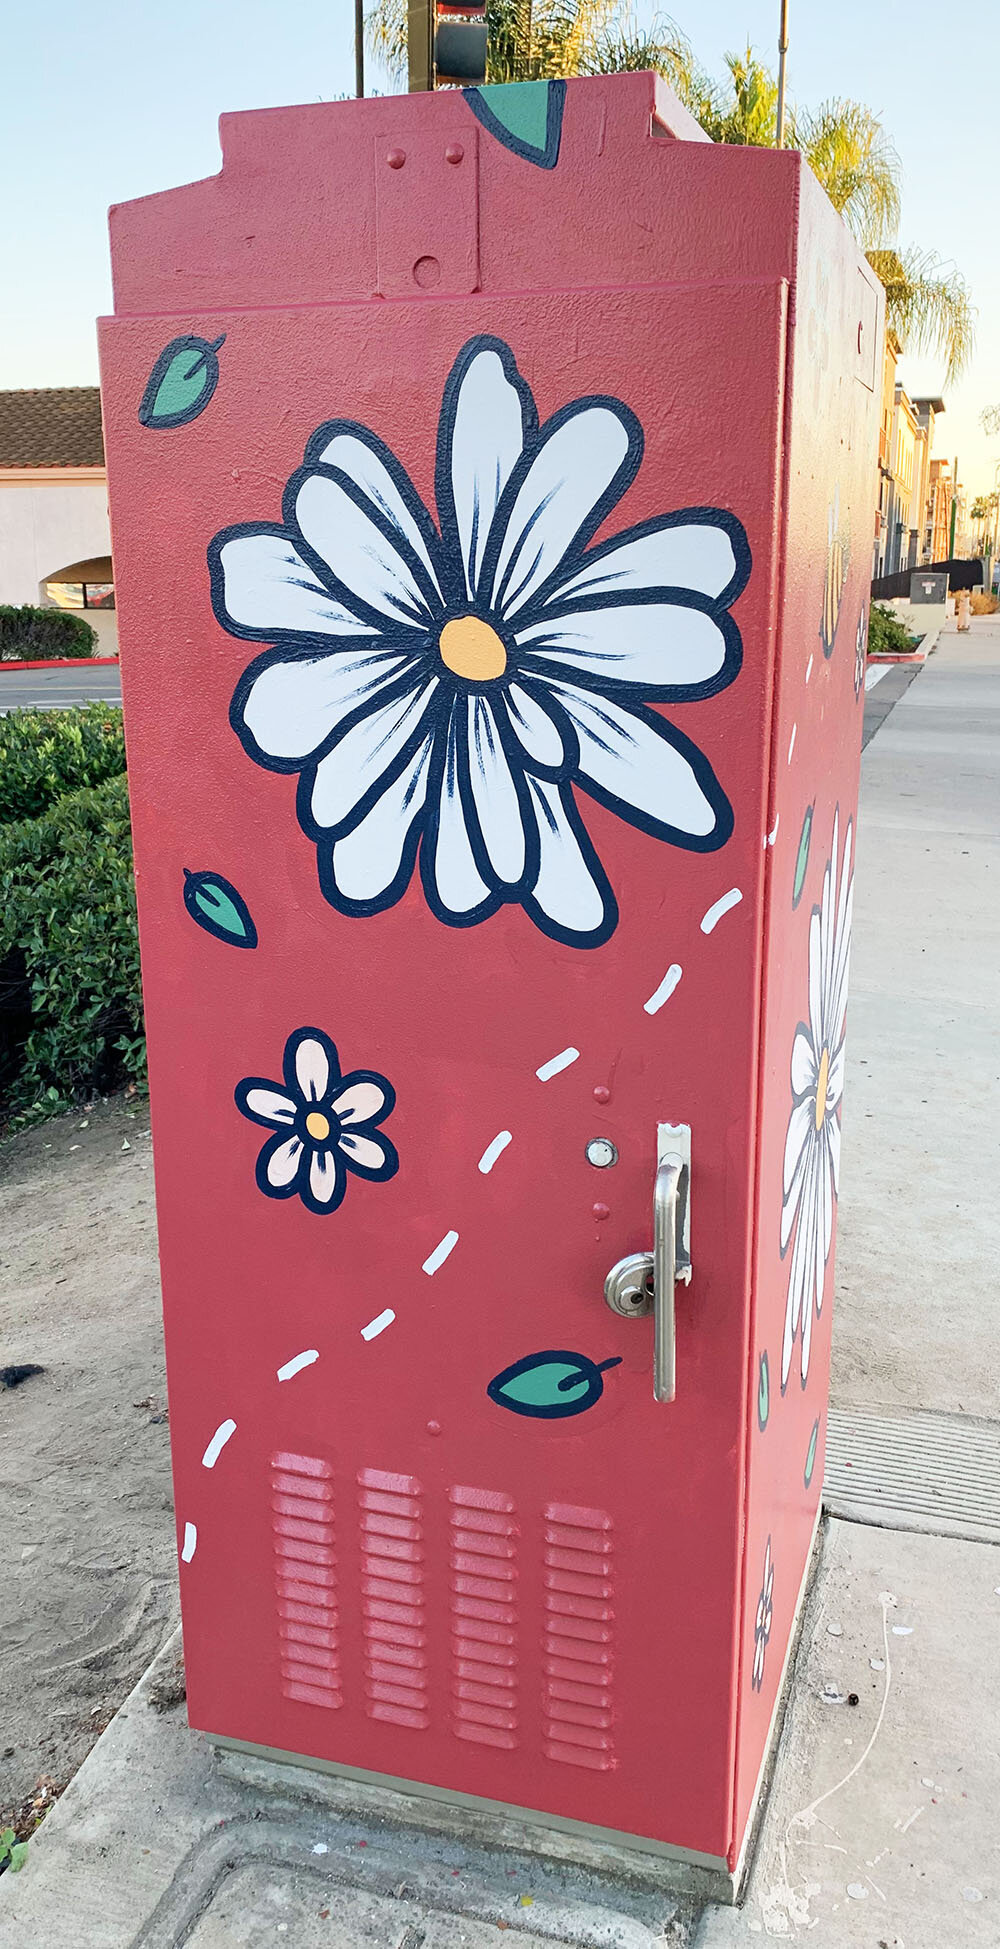


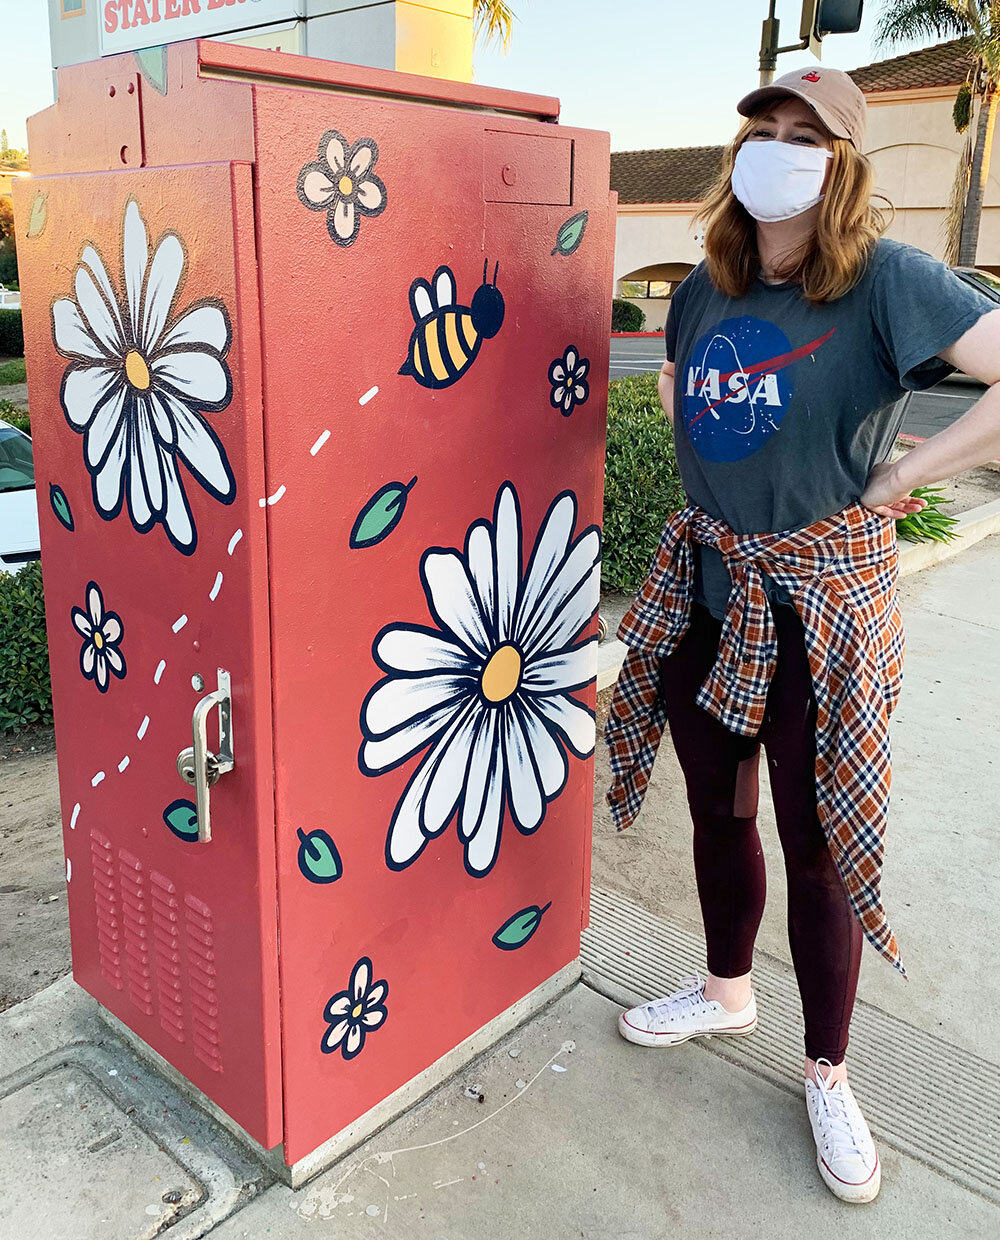
Although I felt absolutely exhausted after painting all day, seeing the final product filled me with such a sense of satisfaction that I could almost ignore the dull aches and pains of my body…until the next morning (I was seriously sore for 4 days RIP). Because I took my time and planned everything out step-by-step, the process of painting felt natural and easy-going. Like I said in the beginning, in the past I’ve kept myself from submitting my work or applying to art-ventures because I thought the project was either “too difficult” or “it’s too difficult and they probably won’t pick me so I shouldn’t even bother”. But after applying and painting and loving the final product of my utility box, I can say that that way of thinking has subsided.
As a final note, and as someone who’s spent almost every day at home since March, painting on the street was overstimulating as heck. I didn’t know how comfortable I would feel being out in public all day, but we kept our masks on the whole time and didn’t come into contact with anyone else other than those we live with. We did receive a few encouraging shouts from cars and a question or two from someone walking past. They all seemed generally excited to see the final product and encouraged me as much as they could while driving past at 40mph. In all that 2020 threw at us, I never expected this project to come to life. I’m really happy with the work I did and I now have a boost of confidence that I can take with me into 2021!
Here are my top five tips for painting a utility box:
Do your research. Most towns will have a theme for their utility boxes, mine was “in bloom”, for instance. Take some time to drive around your area and look at boxes painted by others in your community for inspiration and to get a feel of how others are interpreting the theme.
Use any supplies you have already. $100 sounds like a good amount of money, but it only covered the cost of the paint. To minimize spending and stretch that $100 to its maximum, be resourceful and try to use items you already have at home.
Bring headphones. My box was located on a fairly busy street, and it did get noisy during the middle part of the day. It was nice to listen to music, block out random noise, and zone out while I painted.
Bring 1-2 brushes per paint color + extra zip lock bags. Because we didn’t have access to water to rinse out our paintbrushes after using them, we placed them into Ziploc bags and kept them sealed until we went home. We also had large trash bags to put the disposable paint pans into after we were done using them.
Recruit your friends and/or family to help! This project is no joke and I would highly recommend bringing at least one other person with you. It was nice to only focus on painting while my painting assistant took photos and videos of the whole process.

Please read my most recent utility box experience in La Mesa, California to download an updated supply list and best practices PDF!